Example Uses (Click to Enlarge)
I looked at the various PCB holders available on Amazon and found all of them wanting in some way – either too tall or too expensive (both?). This is the solution I came up with.
If the holder is “too tall” it makes soldering and probing under a microscope difficult. “Too expensive” is a matter of opinion; but, I found a simple way to make a PCB vise for an order of magnitude less than some of the prices I saw on Amazon – and with only off-the-shelf parts! Also there was the challenge and satisfaction of making versus buying. These DIY PCB holders are cheap and easy enough that you can have many of them and leave your boards in the vise when switching between projects.
Features
a. The vise is low profile making it easy to solder or probe while under a microscope.
b. The distance between the two rails is adjustable to fit most any small size PCB.
c. The two rails can pivot to accommodate PCBs without parallel edges.
d. The spacing between the posts is adjustable to fit very small PCBs or PCBs without straight edges.
e. Rubber grommets securely grip the edges of the PCB.
f. Use other Lego parts to modify/enhance the capabilities of the PCB vise.
g. All of the constituent components are available “off-the-shelf”.
h. The total cost of all of the components is approximately 3 dollars! Make a bunch of them.
i. Unfinished PCBs can be left in the vise and hung vertically from a nail for storage.
j. (Bonus) Glue Magnets to the underside of the clamp for storage or to better stabilize the work.
Procuring Parts
Unfortunately, shipping costs can far exceed the cost of components in small quantities. I already had these parts; but most can be purchased locally or in kits of similar parts.
a. If electronics is your hobby I recommend you keep kits of M3 standoffs and other hardware – very useful.
b. I also recommend keeping a quantity of various Lego Technic parts. I find they come in handy to build jigs and prototypes; because I have them I find uses for them. I modify them or combine them with non-Lego hardware. Any Lego part can be ordered directly from Lego for a few cents each; but, also they can often be bought locally as used items.
c. The clamps are available from Harbor Freight and others; but, HF is currently selling them for $1.99 and I have seen them on sale for $0.99.
Assembly
Clamp Alone (Click to Enlarge)
1. Remove the gray plastic pads from jaws of the clamp. (The clamp will not lay flat with these installed.)
2. Replace the thumb screw (gray plastic head) with M4 x 12mm machine screw. This gets the plastic screw head out of the way. And the extra long screw provides a third support point and thus more stability.
3. Drill a 3mm hole in the side of each jaw of the clamp near the clamping face of the jaw. (2 places)
Assembly (Click to Enlarge)
4. Using the M3 screws, washers, and standoffs attach the Lego beams to the clamp jaws as shown in the photos. (2 places)
Use thread locker on the screws to prevent them loosening up during use.
5. Place the rubber grommets on the Lego Connector Pegs. (4 places)
6. Insert the Lego Pegs into the Lego Beams. (4 places)
The positions of the pegs may be adjusted to better fit the PCB being clamped.
7. You are done!
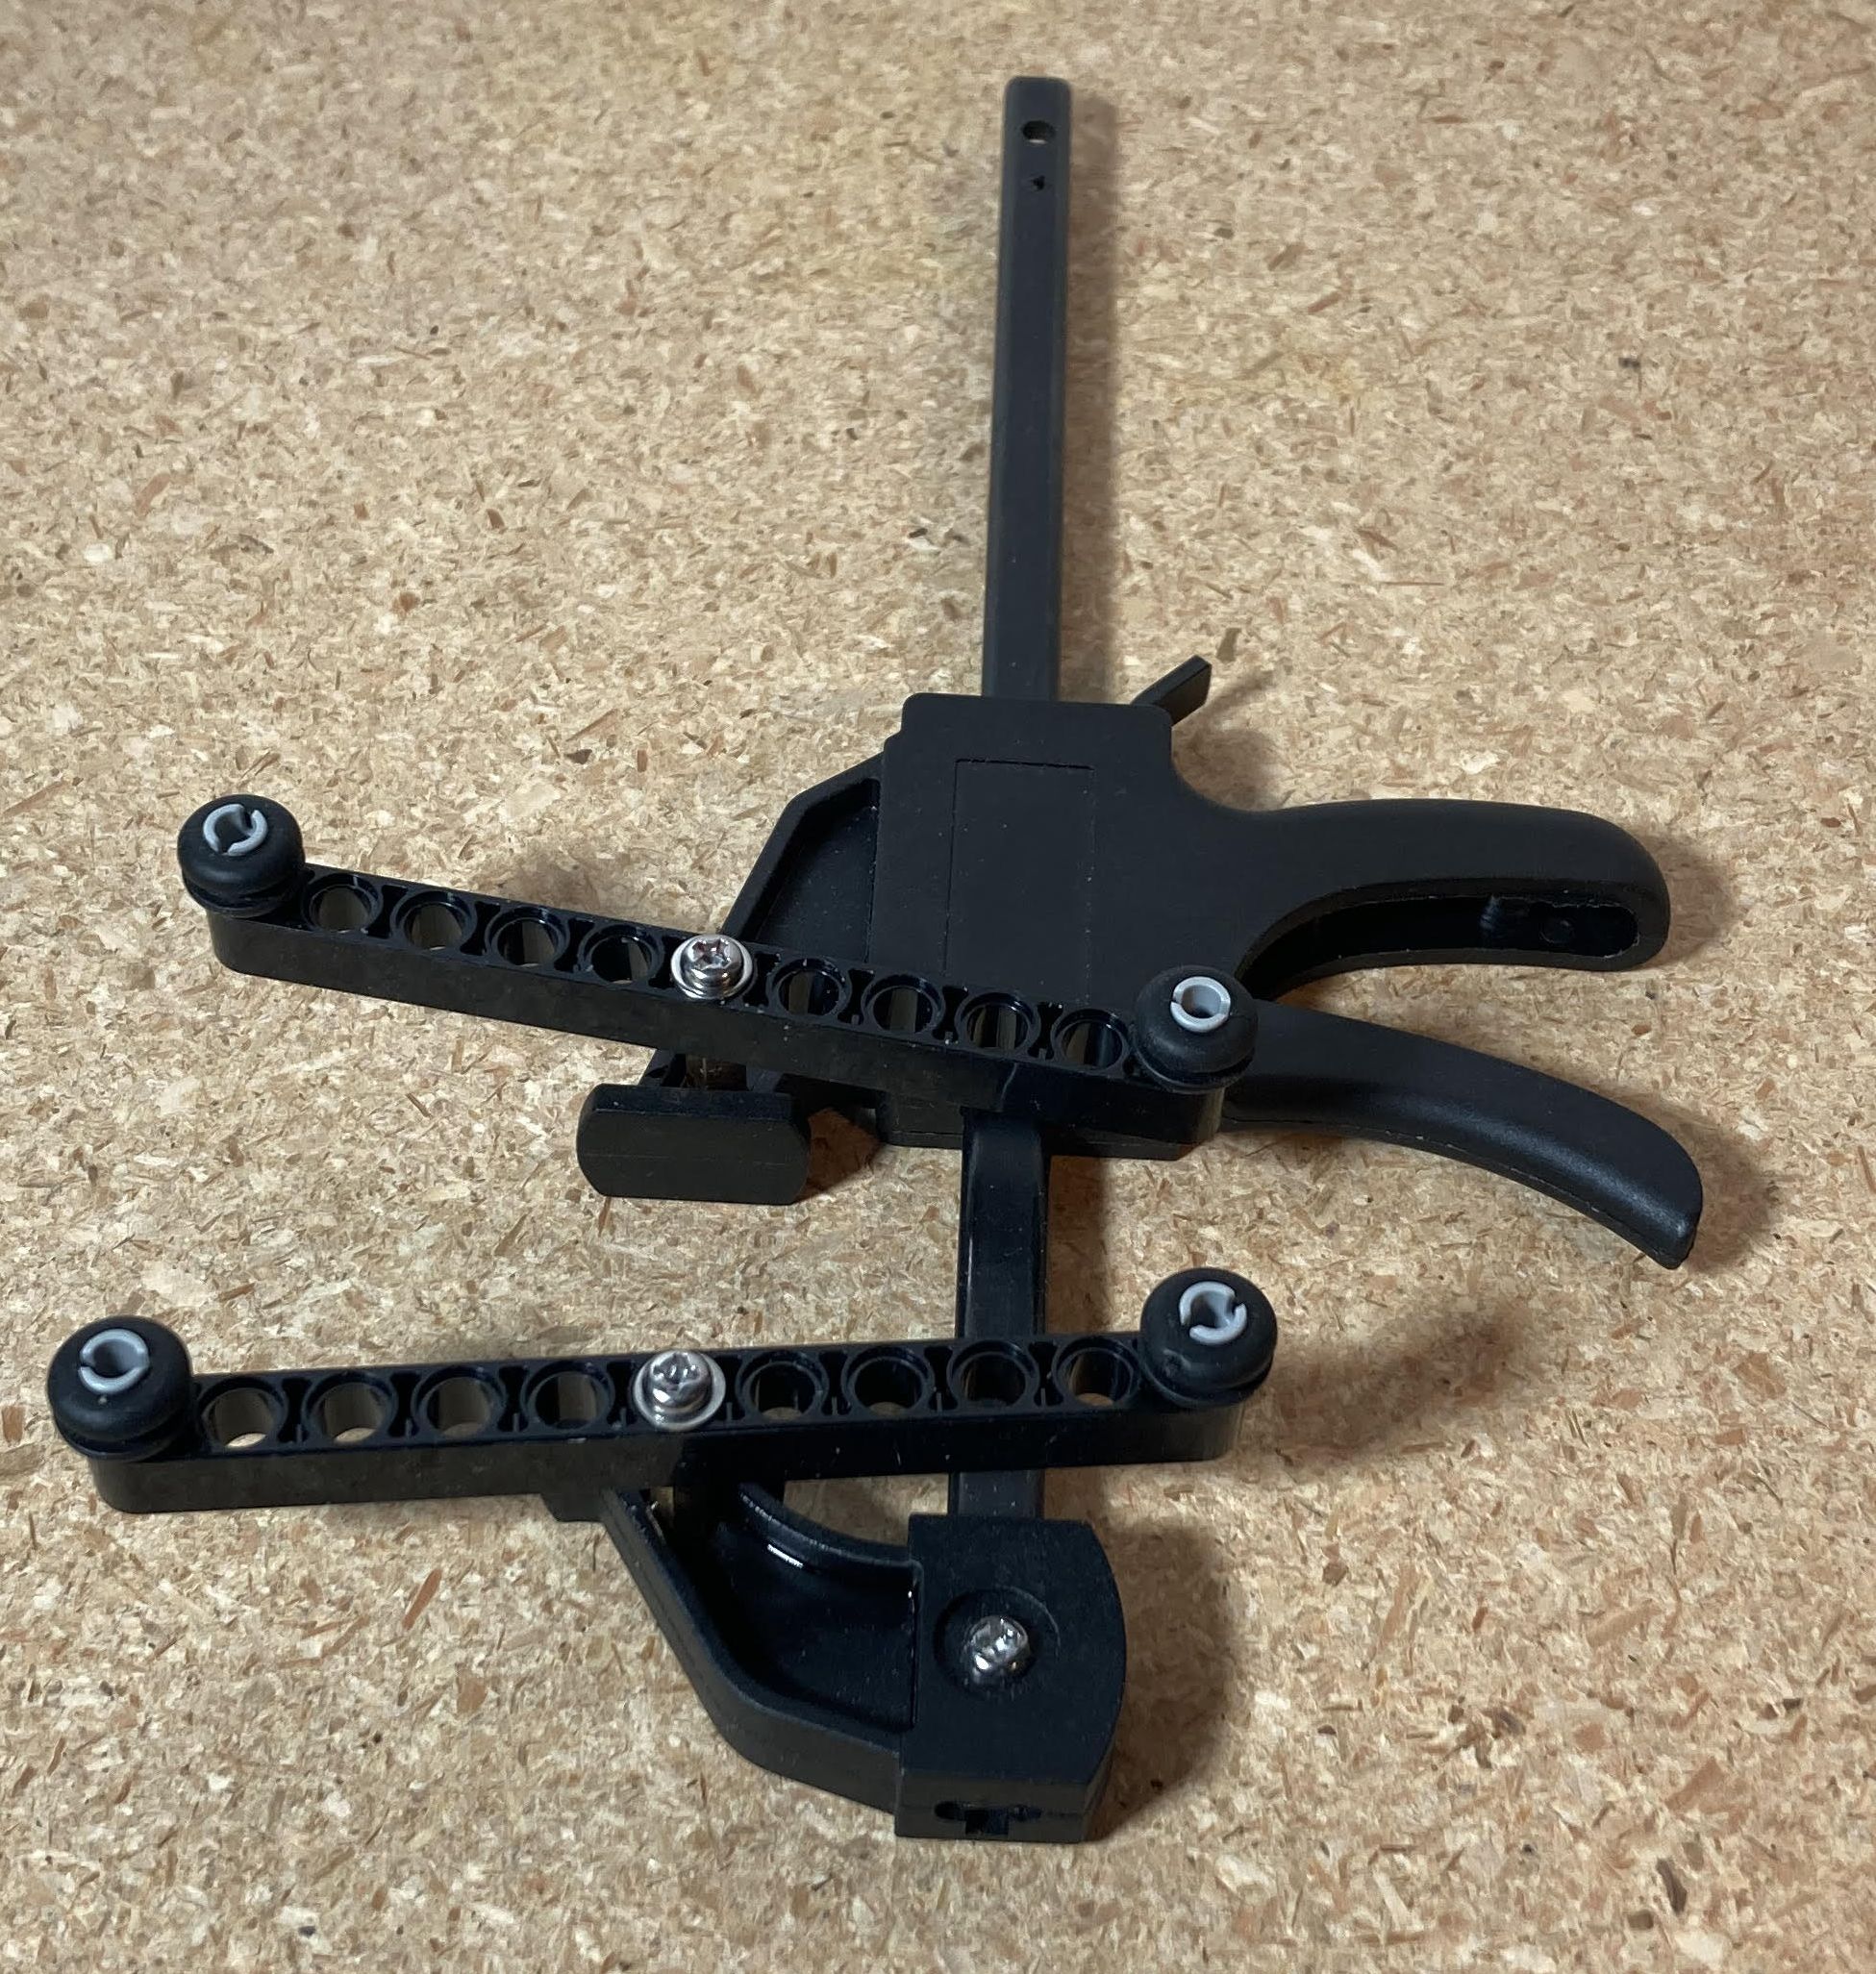
Completed Vise (Click to Enlarge)
Parts List
Qty (1), Harbor Freight / PITTSBURGH 4 in. Ratcheting Bar Clamp/Spreader
Qty (2), Lego Technic 11M Beam
Qty (2), Lego Connector Peg
Qty (4), Rubber Grommet, 3/16″ ID, for 5/16″ hole and 1/8″ thick material (Harbor Freight Kit)
Qty (2), M3 x 6 mm machine screw
Qty (2), M3 x 12 mm machine screw
Qty (2), M3 x 10 mm standoff
Qty (4), M3 washer
Qty (1), M4 x 12 mm machine screw
Thread Locker or Super Glue
Alternate Version
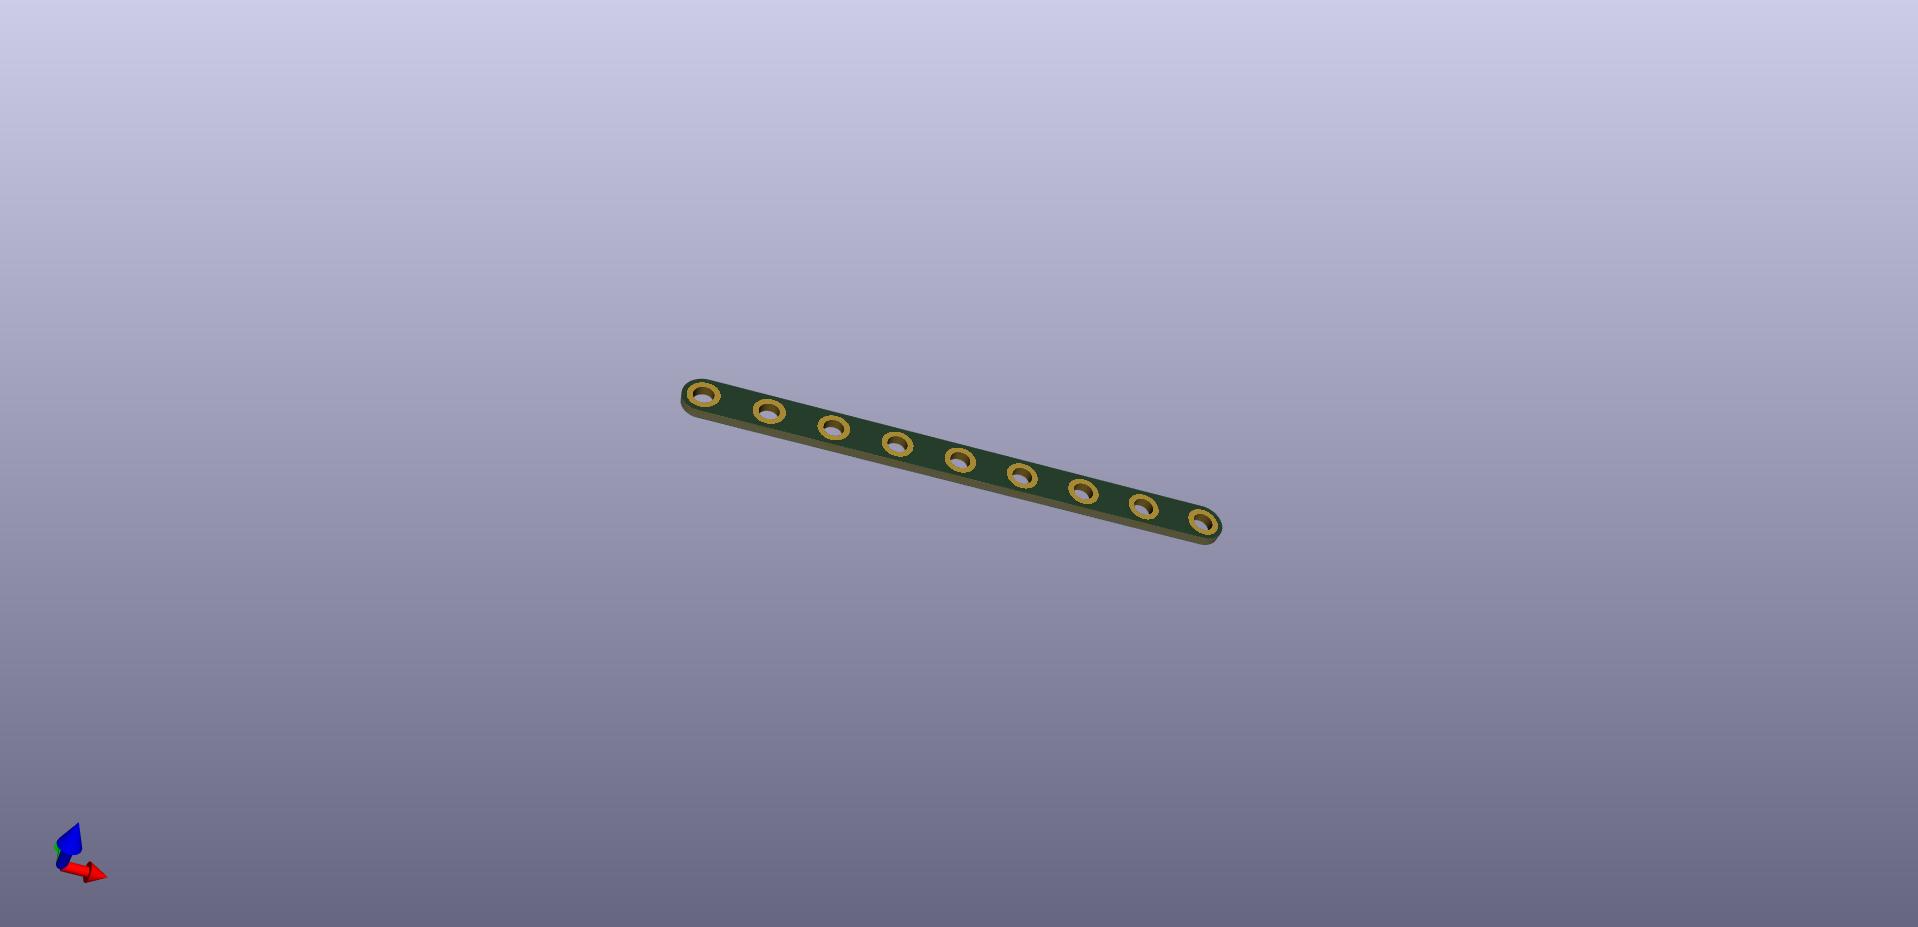
Alternate Beam (Click to Enlarge)
a. Substitute a custom PCB for the Lego Technic Beam
b. Substitute M3 standoffs for the Lego Connector Pegs.